Remove Scuff Marks From Car Vinyl- Scuff marks on the vinyl surfaces of your car can be easily removed. Depending on the severity of the scuff, you have a few choices. You can buy a degreaser designed specifically for automobile interiors or make your own cleaner based on vinegar. Use a magic eraser scrub pad to buff out the scuff after spraying your cleaner on the surface. You can restore your vinyl panel to its original condition by ordering a simple scratch removing kit for more extensive marks. Scuff marks on car vinyl are a common problem that many drivers encounter.
These marks can be caused by various factors, including weather conditions, driving style, and even the quality of the surface material used to apply the vinyl. In some cases, scuff marks may appear on a car’s vinyl despite regular cleaning and maintenance. This is because the scuff marks are not superficial but rather a sign of underlying damage to the vinyl’s surface. In these cases, it may be necessary to have the damaged area professionally cleaned and repaired. One option is to have a professional scratch removal service performed. This will cost a fee and may involve removing small sections of damaged material so that new vinyl can be applied in its place. It is important to note that not all types of damage can be repaired this way, so it is essential to properly assess any signs of wear or tear before deciding on the best course of action.
How to Remove Scuff Marks From Car Vinyl
Scratches will eventually appear on the interior plastic surfaces of your vehicle if you drive it a lot. This is especially true if you use the car for household chores like dropping off the kids at school, picking up groceries, transporting pets, and moving house supplies, among other things. Your car’s interior can look old and worn from scratches and marks. Since no one wants to spend time in a worn-out cabin, those marks can also lower your vehicle’s resale value. Fortunately, these marks and scratches on the plastic interior trim of your vehicle can be fixed. Let’s talk about a few of them.
Scuff marks are the result of friction between materials. In the case of car vinyl, this can be caused by rubbing against other objects, such as seat belts or door handles. Scuff marks can take on different shapes and sizes, depending on the material and how it is impacted. Some scuff marks may appear as small lines or spots while others can be more pronounced and visible. It is important to remember that even if you can’t see the scuff mark, it is still there and could potentially lead to damage over time. As with all types of wear and tear on any object, it is best to regularly maintain your car by taking care of any potential issues such as washing your car or using a wax or polish to upkeep its appearance.
How to Remove Scuff Marks From Car Vinyl Details


| Article for | How to Remove Scuff Marks From Car Vinyl Step by Step Full Guide 2024 |
| How to Remove Scuff Marks From Car Viny | Click Here |
| Category | How to guide |
| Official website | Click Here |
click here:- How to Build a LEGO Car 2024?
Using a Vinegar-Based Cleaner and Magic Eraser
1. Make a homemade cleaner made with vinegar. You can first try making a homemade cleaner if you don’t want to buy a specialized degreaser or scuff remover. Combine water and white vinegar in equal amounts. Fill a clean spray bottle with the mixture.
2. Scuffs can be cleaned up with a magic eraser. You can find magic eraser scrubbing pads at your local home goods, home improvement, or department store, whether they are generic or brand-name. When buffing out vinyl that has been scratched or scuffed, they are the most user-friendly and efficient pad. In addition, unlike a pad that is more abrasive, they will not cause the vinyl surface to wear away.
3. Wipe the scuffed surface after spraying the cleaner on it. Spray enough to cover the area of the vinyl panel that has been scratch. Using long, even strokes, wipe it down with the magic eraser. When you’re done, use a microfiber towel to remove any residue.
4. Add baking soda to the cleaning solution you’re using. You might need a little bit more abrasion for scuffs that are deeper or more serious. Try making a thin paste by adding enough baking soda. Try adding two or three tablespoons of baking soda to a cup (240 mL) of water and vinegar. Blend thoroughly until the baking soda is well-combine.
Check Here- How to Report a Stolen Car
Using Degreaser on Surfaces Scuffs
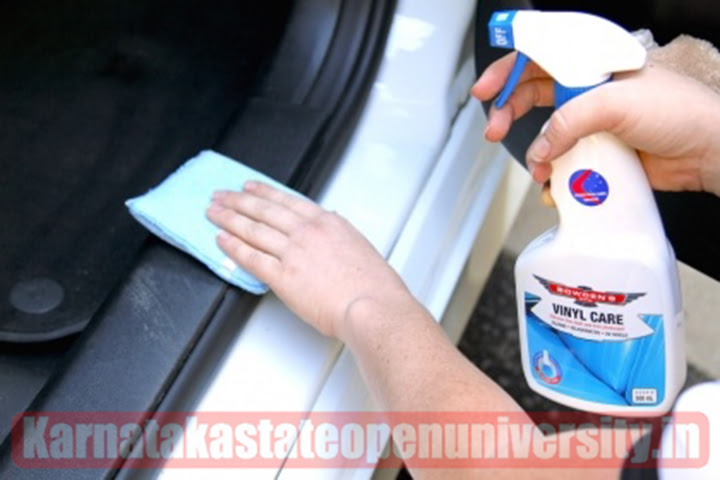
1. Get a car interior degreaser. If you’ve already tried wiping the surface down with a homemade cleaner or just want to use a professional-grade detailer, buy a concentrate degreaser. Degreasers for car interiors can be found at your neighborhood home improvement or automotive store.
When you are ready to use the degreaser, you will need to dilute it because it is a concentrated product.
2. Use four parts water to dilute your degreaser. Before using a store-bought degreaser on your car vinyl, you will need to dilute it. Combine four parts water to one part degreaser. After that, transfer the solution to a clean spray bottle.
3. Scrub and spray the scuffed surface. Directly onto the scuffed vinyl, spray your homemade or diluted degreaser. Use your magic eraser to scrub in even, smooth motions until the scuff is gone.
You can spray the scrub pad in tight spaces where you can’t spray directly. Use a toothbrush with hard bristles if the space is too small for the scrub pad.
4. If necessary, replace your pad. The number of scrub pads you need will be determine by the texture of the vinyl surface. One pad will likely suffice for smoother surfaces. You will likely wear through a pad if the texture is rougher or more rubberize, and you will need to replace it as needed until the scuff is removed.
5. Utilize a microfiber towel to remove any residue. After you have finished buffing the scuff out, you will still have some cleaner and light debris. Utilize a dry microfiber cloth to remove it. You will have a finish that is free of lint if you use microfiber.
Check Also- How to Avoid Car Accident
Dealing with Deeper Scuffs and Scratches
1. Buy a complete kit for removing scratches. If you’re dealing with scratched vinyl or if the scuff is more than just superficial, you might want to invest in a professional kit. A dye that matches your vinyl’s color, an activator to dry the glue, and a glue to fill in the deep scratch will be include in the kit.
- A scratch removal kit can be purchase online for approximately fifty dollars. A dye that matches the factory will be include in your kit to match the color of your vinyl. You can find the appropriate vinyl color when you order your kit by searching for the make and model of your vehicle.
2. Sand the area of the scratch. Smooth over the deep scratch or scratch with 220 grit sandpaper. Make an effort to smooth out the area around the scratch so that the edges are flush with the vinyl.
- Sandpaper is include in some scratch removal kits. Check the contents of the kits before placing your order to ensure that they include sandpaper if you do not already have any fine grain sandpaper on hand.
3. After sanding the area, clean it. Use a damp cloth to wipe the area down. Use store-bought auto interior cleaner or a homemade vinegar solution to clean the area if it is greasy or dirty. Dry the area with a clean microfiber towel.
Also Check- How to change a Car Radiator
4. Spread the glue over the scratch. Wait until the area has completely dried before applying glue if it is still slightly damp after wiping it down with microfiber. Apply a small amount of the superglue that was include in the kit for removing scratches. Using a narrow palette knife, smooth the glue over the scratch.
- Apply the glue activator if it came with your kit to instantly harden it.
5. After the glue has dried, sand it and clean it. Wait until the glue completely dries if you haven’t used an activator. Smooth over the glued surface with your 220 grit sandpaper. After that, dry the area with a microfiber towel and wipe it down with a damp cloth.
6. Apply several light coats of dye that is factory-match. An aerosol sprayer will be provided with the dye. Apply a thin, even coat of spray to the patched area and hold a piece of cardboard under it to help protect the surfaces around it. Reapply after the dye has dried until you have an even coverage.
- The dye will dry more quickly if you have a heat gun on hand. Keep it about 30 centimeters (or 12 inches) away from the dyed surface.
Related Post:-