Debadge Your Car – If you’re like most people, detaching your car from the driveway is a dreaded task. Not only is it a time-consuming process, but it also requires lots of dirty hands and a lot of water. In this blog post, we’ll show you how to debadge your car in just 2024, using a detailed step-by-step guide. We’ll cover everything from the necessary supplies to the best way to execute the process. So whether you’re looking to debadge your car for the first time or just want to refresh your memory, we’ve got you covered.
The badges on their vehicles are removed by many car enthusiasts. Some do it to make their car look better, while others do it to hide the trim they chose when they bought their car. You can remove the badges from your vehicle with household items, and once a coat of wax has been applied, it will appear as though the badge never existed. It is important to note that some vehicle badges are attached using metal or hard plastic clips that connect through the vehicle’s body. The majority of badges are attached at the factory using a strong adhesive glue. De-badging your car is a relatively simple process for most vehicles with simple adhesive badges, though professional body shops may be the best option in these situations.
How to Debadge Your Car?
If you’re looking to debadge your car in the next few years, you’ve come to the right place. In this blog post, we’ll provide a full guide on how to debadge your car in 2024. We’ll discuss the different types of debadging services available and which one is best suited for your needs. We’ll also provide tips on how to get the most out of your debadging experience and ensure that the job is done perfectly. So whether you’re looking to debadge your car for aesthetic reasons or to protect it from weathering, this blog post has everything you need to know.
There are numerous explanations for why Debadge are removed from car. Sometimes it is done to make people believe you own a vehicle with a higher trim level. Or the goal might be to make a sleeker car that makes it harder to tell your car apart from the performance version. Still other people think that taking off the badges from a car makes it look “cleaner” because it makes the exterior look smoother and less cluttered. Sometimes it’s just a matter of wanting to get rid of the annoying badge that says that dealership is the one you’ll never go back to. Here’s how to debadge a car, no matter why you want to do so.
How to Debadge Your Car Details


| Article for | How to Debadge Your Car 2024 in Details Full Guide |
| How to Debadge Your Car 2024 | Click Here |
| Category | How to guide |
| Official website | Click Here |
click here:- How to make phone calls using your Windows or laptop 2024?
Loosening the Adhesive
Debadging your car is an essential step in keeping it clean and free of the annoying adhesive residue left by previous removals. In this blog post, we’ll provide a step-by-step guide on how to debadge your car in less than an hour, using the latest techniques and products. We’ll discuss the different types of adhesives used to remove car stickers, as well as the best methods for removing them safely and effectively. So whether you’re looking to speed up the process of removing car stickers or just need a handy guide to get started, this blog post is for you!
1. Determine how the badges are fastened to the vehicle
Some automotive badges are attached that with clips or rivets that pass through the vehicle’s body and can leave holes, while others are held on with simple adhesive. How you remove the badges will depend on how they are fastened. If your badges have clips that attach to the body, removing them will necessitate body work like filling the holes and painting that part of the car’s body (at least). A reputable body shop is the best place to do this. While you can see if there are clips or rivets when you remove the adhesive, you must first take off a lot of the badge to see if there are any.
- You can often find out how your badges are attached to your vehicle by conducting an internet search by you. Try searching something like, “how to remove it badges on a 2004 Mustang GT.”
- Your vehicle’s repair manual should indicate how the badges are fastened in order to replace them if that they are damaged.
- Removing the trim on the interior of the body it component will allow you to see if there are clips passing through the body of the vehicle.
2. Use hot water to soften the adhesive
When the adhesive has warmed up, removing it is much simpler. Filling a thermos with hot water to pour over the badges is one simple method. Make sure the water is hot enough to steam but not boil, as boiling can burn you and damage the car’s paint. Place the hot water just above the badge on the car’s body. This will let some of the adhesive come into contact with the water and warm the rest of the adhesive through the badge.
- If you don’t have a thermos, you can use any type of water container as long as you get it to the badge before that cools.
- Boiling water may damage the paint and could burn you as. Use hot water, but not boiling water.
- Softer adhesive will let go under pressure and that can more easily be separated from the body.
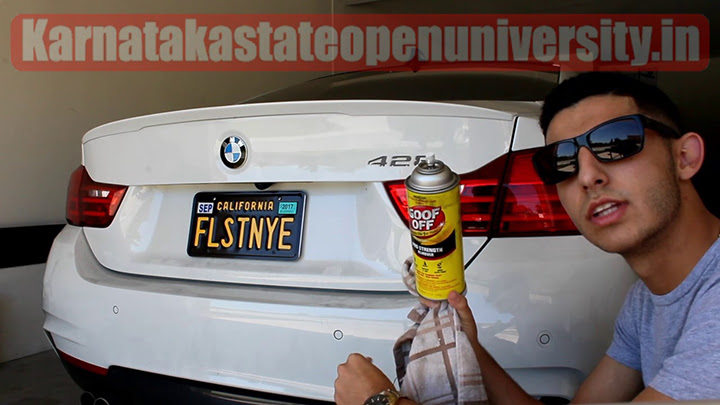
3. Use adhesive remover to soften the glue
Spraying an adhesive remover along the badge’s edges is another option. The adhesive that remains on the body after the badges have been removed can be removed with adhesive remover, which can be purchased at most office supply or big-box retail stores. Look for a spray-on adhesive remover like Goo Gone or a product of a similar type. Spray the adhesive remover along the edges to let it seep between the badge and the vehicle, but don’t apply too much to the rest of the area. On the paint it comes into contact with, adhesive remover will also remove the wax and possibly even the clear coat.
- Adhesive remover will also come in handy when getting rid of the adhesive residue stuck on the body of the vehicle.
- Be careful not to get that any of the adhesive remover in your eyes or mouth when spraying it.
click here:- How to Drive a Car 2024?
4. Use a hair dryer to heat the adhesive
Turn on the highest heat setting on a household hair dryer by plugging it into an outlet close by. Turn on the hair dryer and use it to evenly and steadily heat the badge you want to take off. To soften the adhesive, move the dryer back and forth a few inches above the badge. The adhesive is now soft enough to begin removing the badge if the badge can move or twist under pressure.
- Make sure to heat the entire badge evenly so that all of the adhesive attaching it to the vehicle softens.
- Try to wiggle the badge with your fingers to see if the adhesive is loosening of.
Remove the Badges
If you’re like most people, you probably have a lot of stickers and badges on your car. From bumper stickers to license plates, there’s a lot of junk stuck to your car that’s just taking up space and making it difficult to get around. In this blog post, we’ll show you how to remove all of the stickers and badges from your car in just 2024. We’ll walk you through the simple steps necessary to remove every last sticker and badge from your car in record time. So if you’re looking to declutter your car and make it easier to get around, this blog post is for you!
1. Pry the emblem from the body with a plastic wedge
Put a plastic wedge or scraper on the car’s body panel and press the wedge between the badge and the metal there once the adhesive has loosened. The insignia should easily come off the metal with the help of softened glue. In order to ensure that the adhesive releases uniformly, you might want to approach the badge from a few different angles; otherwise, you run the danger of fracturing the badge.
- Be careful not to apply pressure to the scraper unevenly or you that risk damaging the paint.
- This method may result in breaking the Debadge on car. If know you intend to sell or reuse the badge, you may want to opt for a different method.
Also Check :-How To Activate BSNL SIM Card After Expiry 2024? Step by Steps Full Guide
2. Use dental floss or fishing line to cut adhesive
Wrap the ends of a ten to twelve-inch piece of dental floss or fishing line around your index fingers. On the side of the badge that is facing away from your body, pull the length of line between your fingers through the area of loose adhesive. To get the line through all of the adhesive, you might need to move your hands back and forth in a sawing motion. Once finished, the badge itself should come off with just a small amount of glue remaining on the car.
- Pull the line toward yourself, cutting through the adhesive attaching the badge to the body’s.
- More force will be require to cut through the adhesive if it that isn’t sufficiently warm.
- You will most likely be able to remove the entire badge without breaking it using this method truly.
3. Use a credit card to cut the adhesive and pry the badge from the car
You can take off the badge using a credit card if you don’t have a plastic wedge or any fishing line. Slide your credit card under the badge and gently pry up once the adhesive has warmed up as needed. Slide your credit card around at various angles to break up the adhesive and separate the metal from the badge.
- Make sure the side of the credit card with the numbers is facing out so you can don’t scratch your paint.
- The warmer the adhesive, the easier that will be to separate the badge from the vehicle using your credit card.
4. Use adhesive remover to remove adhesive residue
There will still be adhesive remnants from when the badge was attached to the vehicle’s body after it has been removed. Use a clean microfiber towel to rub the leftover residue off the car after spraying an adhesive remover like Goo Gone on the residue.
- Rub the adhesive remover over the residue in a circular motions.
- Be careful not to spray the adhesive remover in too large an area, as it that will remove wax and can damage clear coat.
Cleaning and Waxing the Paint
Do you want to clean and wax your car in just 2024? If so, you’re in luck! This blog post will teach you how to debadge your car in just a few simple steps, using the latest and most advanced techniques. We’ll discuss the different types of car cleaning and waxing services available, as well as the benefits and drawbacks of each. We’ll also provide tips on how to choose the right service for your needs, as well as how to avoid common mistakes when cleaning and waxing your car. So if you’re looking to clean and wax your car in just a few simple steps, this blog is for you!
Check Also:-How to Start a Manual Car on a Hill?
1. Wash the de-badged area with soap and water
Make sure there is no glue or adhesive remover left on the paint by first using warm, soapy water. You don’t want to seal the adhesive to your paint under a coat of wax because the wax will act as a seal once it is apply. To make sure the area is fully clean, lightly scrub it with a sponge and then thoroughly rinse it.
- Make sure to use soap designed for automotive applications, as things look like dish soap will remove more wax and clear coat from the paint.
- Ensure the sponge is clean of dirt and debris before you it begin scrubbing. Any debris caught in the sponge can that cause scratches in the paint.
2. Allow the area to dry completely
Once the area the badge was is completely clean, use a clean microfiber towel to dry it thoroughly by you. You may also that want to allow it to air dry for a an hour or two before you begin applying wax, as it’s important for the paint to be completely dry before you can begin.
- Wax will not apply evenly to wet or moist surfaces, so it wait until the paint is completely dry.
- Some waxes are design to work on wet surfaces, but these often do not offer the same level of protections.
3. Ensure the vehicle is out of direct sunlight.
Wax shouldn’t be expose to direct sunlight for it to function properly. The optimal conditions for automotive wax are cold, shaded areas. It’s crucial that the wax is apply to a cool surface. Elements of the wax will quickly dry out if the temperature is too high, making it impossible to efficiently wax the de-badged region. The area of the car you are waxing should be in a cool, shaded area.
- Waxing your car in direct sunlight will it result in a worse final product and lackluster shine.
- Be sure the metal of the car has cooled from when that you were heating the adhesive.
4. Apply the wax in a circular motion.
Apply a small amount of the wax to the area that was once under the badge after the vehicle has completely dried using the applicator that came with the wax. You will only need a small dab of the liquid wax for the area you are working with. Apply enough wax to fill the applicator about the size of a quarter. In a circular motion, rub the wax compound into the paint.
- Ensure you apply it the wax evenly to the area.
- More wax does not necessarily mean a brighter shines. Only use as much wax as you need to it.
Read Also:-How To Activate BSNL SIM Card After Expiry 2024?
5. Wait for the wax to dry
Before buffing the wax off, you must allow it to completely dry after applying it evenly to the vehicle’s surface. Some waxes are made to dry quickly, so you might be able to buff them off in a few minutes. Some might take up to an hour. When the wax turns white, you will know it has dried out.
- Take your index finger and lightly swipe that through the dry wax. If it rubs off onto your fingers, it’s dry.
- If the wax still sticks to the vehicle, allow that dry for another few minutes and try again.
6. Buff the wax off with a microfiber towel
Take a clean microfiber towel and use a circular motion to remove the wax once it has dried completely. You will be able to see the newly shiny paint beneath as you remove the dry wax residue. To avoid covering the towel in wax residue while buffing the wax off, rotate it as necessary.
- Do not apply too much force when buffing the wax residue off of the car. If it is difficult to remove, the wax hasn’t dried sufficiently yet it.
- There may be some wax residue dust left over after buffings. Lightly blow on the body panel of the vehicles to remove the dust.
Reviews
Looking to get your car looking its best for the new year? Check out our blog for tips on how to Debadge your car in 2024! In this post, we’ll discuss the different ways you can debadge your car and give you a wide range of reviews from people who have actually done it. We’ll also provide a list of the supplies you’ll need and a guide on how to do it properly. So whether you’re looking to get your car looking fresh and new or just want to avoid any potential damage, our blog has everything you need!
Are you tired of seeing dirty marks all over your car? Debagging your car is one of the best ways to keep it clean and free from dirt and dust. In this blog post, we’ll discuss the benefits of debagging your car and provide a range of reviews from customers who have successfully done it. We’ll also provide tips on how to properly debag your car, including advice on what type of cloth to use and how often to do it. So whether you’re looking for a way to keep your car clean and free from dirt and dust, or just want to know what the best debagging method is, this blog post is for you.
Conclusion
In this blog post, we have provided you with a debadging guide for your car in 2024. We have outlined the different steps you will need to take to properly debadge your car and ensured that all the information is easily accessible for you. We have also included a conclusion at the end of the blog post, which summarises all of the information contained within. So whether you are looking to debadge your car for aesthetic purposes or to protect it from the weather, this guide has everything you need to get started. Thanks for reading!
In this blog post, we’ve provided a comprehensive guide on how to debadge your car in 2024. We’ve outlined all the steps you need to take and the materials you’ll need, as well as provided a detailed conclusion at the end of the article. So if you’re looking to debadge your car in the next few years, be sure to read through this article carefully and plan ahead!
Frequently Asked Questions
What is the best way to Debadge a car?
After that, use a clean microfiber towel to rub the remaining residue off the vehicle, using an adhesive remover like Goo Gone on the residue. Rub the adhesive remover over the residue in a circular motion. Be careful not to spray the adhesive remover in too large an area, as it will remove wax and can damage clear coat.
Should you Debadge your car?
Debadging a car, according to many automobile enthusiasts, makes cleaning it easier. Because small crevices are difficult to clean wax from, manufacturer badges are known for trapping it. Sleepers are also debadged to cover any signs of a high-performance automobile.
How do you Debadge safely?
When you want to cut away and go up and down in a flossing motion, you may see the emblem beginning to loosen towards you rather than towards the paint. Get away from the vehicle for a while.
How do you Debadge a car without damaging paint?
We don't want to employ any sort of razor blade since the whole purpose of doing this is to remove the badges without damaging the paint right now, we've utilized double sticky tape or two-sided tape. We're going to do it like this.
Related Posts:-
How to Make Out 15 Simple Steps 2024?
BMW G 310 RR BS6 Price in India 2024