Tying a tie is a wildly simple thing. Hell, it’s right there in the name. But is it happening right? It matters. Tying the right knot with the right occasion and shirt collar is key to a well-executed finishing touch. No, a fist-sized power knot won’t pair with your slim-cut shirt and blazer. Whether for business or social occasions, some outfits look better with a tie. Located below the shirt collar and tied around the neck, a straight tie brings a level of professionalism and elegance to a suit, vest, or shirt and slacks. Although clip-on ties may seem like the easiest route, hand-tied straight ties are the most attractive option. Knowing how to tie a tie can reveal many new styles and looks. With six tie knots to choose from, there’s something for every neck size and shirt style.
How to Tie a Tie
If you prefer an easier knot, we suggest starting with the full Windsor. Our methods and simple instructions on how to tie a tie allow men and women to sport a polished tie in minutes. People should practice tying knots in front of the mirror for best results. It begs the question: what is the tie in the 21st century for? Beyond the demands of tradition and tradition, a tie doesn’t keep your neck warm and — outside of the workplace, and yet this isn’t obvious seems increasingly at odds with the increasingly relaxed way of dressing. At first, it may seem that we are at the end of an era. After all, men have worn some kind of neckwear for centuries.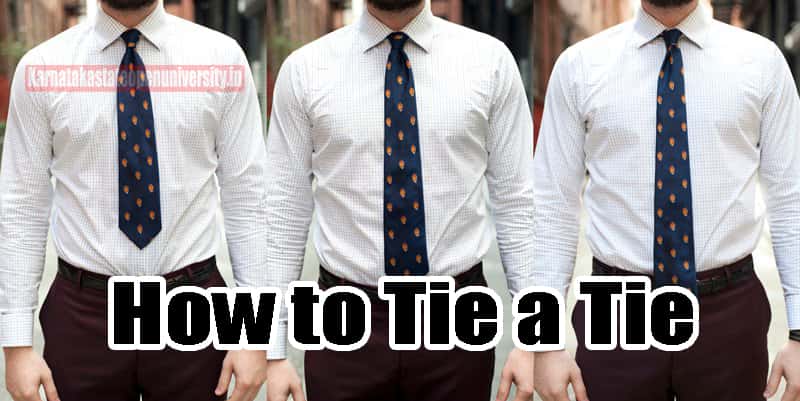
Yes, even before there was an office, there was the issue of how to tie a tie. Of course, tie-makers will always offer a celebratory explanation for the existence of the relationship for all these years. “The tie has survived only because, under the right conditions, men look better in more than one tie a tie knot frames the face,” argues Michael Hill, tie-makers and creative director of menswear brand Drake. “And the fact that you don’t see ties being worn everywhere makes it a much more powerful tool. You can use a tie a substitute for a tie, and how it’s tied to say that you What to call it. You can’t do that with many items of men’s clothing. You have many options available to you, from the versatile four-in-hand knot to the classic Windsor. If you’re helping someone else put on a tie, see this article for instructions on how to approach that.
What Does the Smiling Face with Hearts Emoji Mean?
Types of Necktie Accessories


- Tie bar: slide down the middle of the tie to keep it in place
- Tie Clip: Clips in place and attaches to the same area
- Tie tack: Featuring a pin, base, and chain that helps keep the tie from being moved
- Tie Chain: Features a bar and chain combination
- Tie Strap: The label on the back of the tie slips through and attaches to the button of the shirt
How to Tie a Full Windsor Knot
- To begin tying the Windsor full knot, lift the shirt collar up and wrap the tie around the neck so the wide end is on the right and about 12 inches below the narrow end.
- Cross the wide part of the tie over the narrow part.
- Pull the wide end up through the neck opening, then down.
- Pass the wide end down and the right side of the narrower end with the wrong side facing out.
- Cross the wide part over the narrow part and over the left, with the right side facing out.
- Pull the wide end up through the neck opening.
- Pass it through the front loop while bringing it down.
- Holding the hanging parts with one hand, carefully slide the knot up toward the collar with the other hand until snug, then lower the collar.
How to Tie a Tie Quick and Easy Process
How to Tie a Four-in-Hand Knot
- To complete this knot, lift up the collar of the shirt and wrap the tie around the neck so that the wide end is on the right and about 12 inches below the narrow end.
- Bring the widest part of the tie over the narrower part.
- Then bring the wide part under the narrow part.
- Bring the wide part back over the narrow part.
- Bring the widest part up through the large loop at the neck.
- With a loose grip on the knot, insert the wide end through the front loop in a downward direction.
- Holding the bottom narrow part of the tie with one hand, slide the knot up with the other hand until it is neat and secure.
- Lower the collar of the shirt to complete the look.
How to Tie a Half Windsor Knot
- Cross the wide part over the narrow part.
- Cross the wide part behind the narrow one so that the wrong side is facing out.
- Bring the wide end up and over to the top left.
- Pull it through the neck opening so that it takes the wrong side to the right.
- Keeping the right side facing up, bring the wide end over the narrow part from right to left.
- Bring the wide end over the neck loop again.
- While bringing it down, insert it through the loop at the front of the collar.
- Adjust the knot by sliding it up with one hand and holding the tail with the other.
- Lower the collar of the shirt to complete the look.
How to Tie a Pratt Knot
- To begin tying the Pratt knot, lift up the collar of the shirt and drape the tie from the wrong side up, so that the wide end on the right hangs about 12 inches lower than the narrow end.
- Cross the wide part of the tie under the narrow part.
- Bring the wide end up and loop it down through the neck opening and tighten.
- Cross the wide end over from right to right.
- Pull it up through the neck opening.
- Bring it down through the knot loop.
- Gently slip and adjust the knot and lower the collar of the shirt to complete the process.
How to Tie a Trinity Knot
- To tie a Trinity knot, raise the collar of the shirt and drape the tie around the neck, with the widest fringe hanging to the right, just above the navel.
- Pinch the long side of the tie to create a dimple in the fabric, just below the collar.
- Take the thin part and cross it over the thick part.
- Bring the thin end up through the neck opening.
- Bring it back down to the right.
- Cross it under the thick part of the tie and the other side, the wrong side up.
- Bring up the narrow end.
- Pull it through the neck opening and to the right to make a heart shape.
- Take it in a heart shape and bring it above the neck loop.
- Keeping the top loop of the knot loose, pull it through the knot.
- Then move it behind the thick part to the other side.
- Now bring the short end up and through the loose loop.
- Adjust the knot for tightness and symmetry and tuck the end under the neckline.
- Fold the shirt collar down for a finished look.
How To Download WhatsApp Status
How to Tie an Eldredge Knot
- To begin tying the Eldredge knot, lift up the collar of the shirt and drape the tie so that the wide end is on the right, just below the navel.
- Pinch the thick part of the tie near the collar to create a long dimple.
- Bring the thinner part over the thicker part of the tie.
- Bring the thin side under the thick part of the tie, the wrong side up.
- Bring the thin part up towards the neck.
- Bring it through the neck loop to the bottom right, wrong side up.
- Going to the left, take it around the front of the knot.
- Raise it above the neck loop.
- Bring it back down to the right.
- Take it to the left behind the widest part of the tie, the wrong side up.
- Take it from front to right and through the loop, you made in the previous step.
- Tighten the knot by pulling the narrow end to the right.
- Bring the end straight up and through the neck loop to the right side of the knot.
- Again, bring it over the knot to the left of the knot.
- Keeping the knot loose, bring the short tail to the right and through the loop you just created.
- pull to tighten.
- Tuck the back end of the neckline to the left. Lower the collar of the shirt for a smart and finished look.
How to Tie a Kelvin Knot
- Drape your tie along the seam around your collar and the thick end to your left.
- Hang your end two or three inches below where you hope to meet the tie.
- Cross the thick end under the thinner part left to ride.
- You should make an X under your chin.
- Move the thick end into the front knot from right to left.
- Wrap around the thin end and pass under the knot from left to right.
- Bring the thick end to the front horizontally by rolling it from right to left.
- Press one finger under the horizontal band you just made.
- Place your thick end under the loop around your collar.
- Bring your thick end through the horizontal loop.
- Tie the knot at the bottom.
- Tighten the knot by holding it with one hand and pulling it at the narrow end with the other.
How do I tie a two-piece bow tie?
The two-piece bow tie is a popular style that can be easily tied by following these steps: start with the center section of the bow tie, which should be wider than the side sections. Take one end of the wide section and fold it in half so that it forms a “U” shape. Make sure that both ends of this “U” are pointing towards your chest. Now make a small loop with this folded edge and put it inside your other loop on the center portion of the bow tie. You now have an adjustable “bunny ear” (pictured below). Next, take hold of both bunny ears and pull them tight until they form a slight O shape around your neck (see image below). Finally, tuck away any excess Bunny Ears fabric by clipping them together at either end or simply pulling through to tighten up .
Related Posts
Nice post you have here! I gain a lot the new ideas you present in this article. Thanks once again.