Make a Paper Car- Making paper cars with your kids is a fun project to do together. The best part is that your child will get to play with a paper car afterward. You can begin with a straightforward origami car. You can make a paper car that moves instead if you have more time. Making paper cars with your kids is a fun project to do together. The best part is that your kid will have a paper vehicle to play with a short time later. You can begin with a straightforward origami car.
You can make a paper car that moves instead if you have more time. Making a paper car is a fun and creative project for kids and adults to spend time on. The first step is to gather the necessary materials. You will need several pieces of paper, a glue or paste gun, and some scissors. You can also use other materials such as construction paper, pens, markers, and colored pencils to make the car more colorful and interesting.
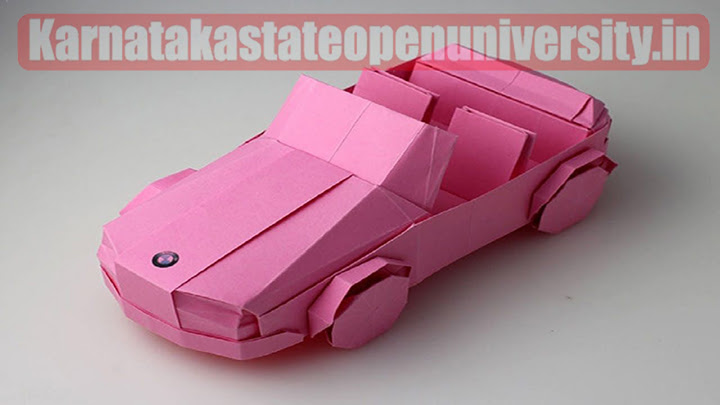
How to Make a Paper Car
Create a T that is 8 inches (20 cm) long and 1 inch (2.5 cm) wide at its horizontal top. Printer paper or construction paper can be used to make your car, but cardstock is much better. The car’s sides will be made from the horizontal portion at the top. Place a magnet on the tabletop’s bottom so that the car’s pole and the tabletop’s magnet’s pole are opposite one another. The car will that move in any direction away from the magnet if the magnetic poles are not positioned opposite one another.
Once you have gathered your supplies, it is time to start cutting, folding, and gluing! It is important to cut your paper into the right shape and add layers until you get the look you want. You can use different colors or patterns to create different effects for your car. It is best to start small when making a paper car. If you are new to this craft, try making one that has only two or three layers of paper in order to master the technique before moving on to more complex projects. With practice, you will be able to make intricate designs with lots of detail and color.
How to Make a Paper Car Details


| Article for | How to Make a Paper Car Step by Step Full Guide 2024 |
| How to Make a Paper Car 2024 | Click Here |
| Category | How to guide |
| Official website | Click Here |
click here:- How to Build a Robot Car 2024
Making a Flat Origami Car
1. In the middle of the origami paper, make a crease. Divide the paper in half across the width. After making a crease by running your fingernail along the fold, unfold the paper.
2. The paper’s top and bottom edges should be fold in half. Reduce the paper’s top edge by one-third. The next step is to fold the paper’s bottom edge up by 1/3. Your paper should now have three sections of equal size.
- The folded top and bottom edges will be refer to as the “top” and “bottom” flaps throughout the remainder of the tutorial.
- Your paper’s middle will be white, while the top and bottom thirds will be color. The middle of the car will be color if the car is white.
3. Up the top flap’s corner until it extends past the folded edge. Return to your upper flap. The bottom-right corner should be fold inward until it reaches the top of the folded edge. The left corner should extend approximately 1/3 of the way across the flap.
Also check- How to Make a Car in Minecraft
- For this step, keep the top flap folded down. Don’t open it!
4. The other corners should be fold similarly. Fold the top flap’s bottom-left corner upward. The next step is to fold the bottom flap’s top two corners inward. Your flaps should be 1/3 the length of each fold corner.
- The procedure for the bottom flap is essentially identical to that for the top flap. Rotate the paper so that the bottom flap runs parallel to the top if necessary.
5. To give the corners a more wheel-like appearance, fold the corner tips. The wheels will be made from the folded corners you just folded. They are, regrettably, pointy, which is not particularly wheel-like. Flatten the corner tips by folding them down to fix this.
- You can “cheat” by cutting the corners into semicircles if you want to. However, this is a departure from origami.
6. Along the first crease, fold the paper in half. Make sure the color you want is on the outside of your car because this completes the body. To sharpen it, make sure to run your fingernail back and forth across the top crease.
- You have a fold at the bottom, just above the wheels. To make it look neater, you can run your fingernail across it on both sides of the vehicle if you want to.
Check Also- How to Remove Bugs, Tar, and Sap
7. To create the trunk, fold the top right corner inward. With your left hand, hold the car with care. Until the crease enters the vehicle, press down on the right side. Make a crease by flattening the car and running your fingernail along the edge.
- A pocket fold is the term for this.
- In order to match the back wheel, fold the pocket at a deep angle.
8. For the windshield, fold the top left corner inward. Make use of the same method you used to create the windshield. This time, fold the pocket at an angle so that it reaches beyond the front wheel.
- By running your fingernail across your creases, take a moment to sharpen them. Although it is not absolutely necessary, this will improve the appearance of your vehicle.
9. Place the automobile on its wheels. The car won’t lie flat because of the pocket folds. It Cought to be able to be raise on all four wheels.
- By drawing some windows, doors, handles, and other details, you can take your car to the next level.
Check Here- How to Open Car Doors 2024
Conclusion
If you’re looking for a fun and creative way to spend a day, making a paper car is definitely the way to go! By following these simple steps, you can create a beautiful and unique car that will be sure to impress anyone who sees it. Not only is this project easy to do, but it’s also a lot of fun – perfect for any occasion! If you’re interested in learning how to make a paper car, be sure to check out our blog for more information. We hope you enjoy the blog and have fun creating your own paper car!
Related Post:-
How to Remove Grease and Oil From a Car Interior 2024
Remove Vomit Smell from Your Car 2024