Install a Car Amp- You can listen to music at a higher volume and hear better sound thanks to amplifiers in your vehicle. Installing a car amplifier can be challenging due to working with the electrical system of your vehicle, but it can be complete in three to four hours. To begin mounting your amplifier, locate a flat spot inside your vehicle and screw it down. To connect the amp installation kit’s wires to power and the stereo system, run them along the sides of your vehicle.
Adjust the amp’s volume settings to prevent distortion after plugging in all the appropriate wires and finishing the installation. While you are working on your vehicle, be sure to disconnect the power. Installing a car amp is a pretty straightforward process. You’ll need to obtain the amp, of course, and then take it out of the box and unpack it. Next, you’ll need to connect the wires from the amp to your vehicle’s electrical system. It’s usually a good idea to check with your car’s owner’s manual for specific instructions on how to do this.
How to Install a Car Amp
You probably want to upgrade your car stereo system on your own if you enjoy working on cars. This is a great chance to learn more about your stereo’s operation and how to get the best sound possible from it. You can also learn some useful skills by installing an amplifier and the speakers that go with it. These skills can be use for future upgrades and tweaks. Go for it even though this is a difficult job if you are confident in your wiring skills.
Additionally, if you require assistance along the way, don’t hesitate to get in touch with Audio Motive’s experts in car stereos. Once you’ve connected the wires, you can install the amp in your vehicle as usual. Make sure that you use a proper mounting kit if you’re installing an amp in a vehicle with an elevated roofline or open-air cabin. Otherwise, you could risk damaging the unit or even injuring yourself if it falls off! Overall, installing a car amp is a fairly straightforward process that just takes a little bit of time and effort on your part.
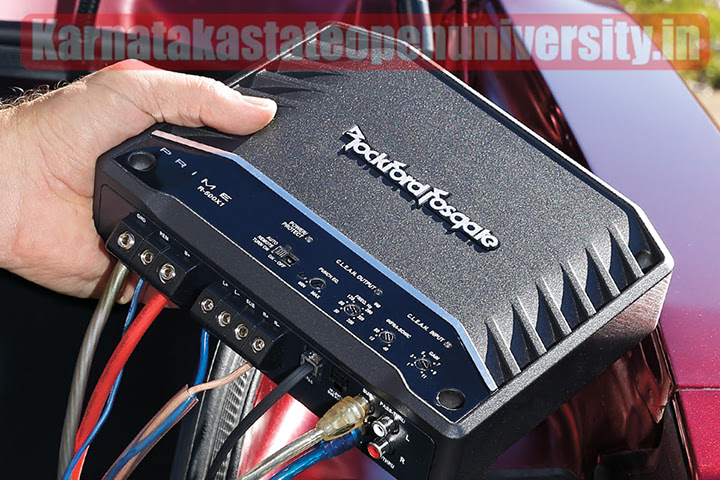
How to Install a Car Amp Details


| Article for | How to Install a Car Amp 2024 |
| How to Install a Car Amp | Click Here |
| Category | How to guide |
| Official website | Click Here |
click here:- How to Build a Robot Car 2024
How to Install a Car Amp 2024 Full Guides
f you’re looking to add power to your car audio system, a car amp is the perfect solution. A car amp is a small, portable device that attaches to your car’s stereo and amplifies the sound of your music. Car amps come in a variety of shapes and sizes, and they can be used with a variety of types of speakers. In this guide, we’ll walk you through the basics of installing a car amp and help you choose the right model for your needs.
What You’ll Need
Car amplifiers usually don’t come with wiring, so you’ll need to do buy wiring to hook up your amp to your car stereo system.
Power and Ground Wires
You will need to connect the power and ground wires of your new amplifier to the electrical system of your vehicle in order to supply it with power.
In order to withstand the amp’s power demand, these wires must be thick enough. A wire that isn’t thick enough could interfere with the operation of your amplifier or, at the very least, prevent it from producing the power that it is design to.
The recommended wire size for your amp can be found in the manual. Diameters, or gauges, are use to measure the size of wire. The thickness of the wire will increase with the gauge number.
If you want to get the right length of wires, take the time to measure the distance between the amplifier and the car battery.
Also Check- How to Bleed Car Brakes 2024
An In-Line Fuse
The main power cable must have an in-line fuse within a half-foot of the connection to the battery. You, your car, and your stereo system are shield from a potential fire-starting short circuit by this fuse.
A typical 16 to 20-foot fuse run is safe using one of the following items:
- 25-amp fuse for 10-gauge wiring
- 60-amp fuse for 8-gauge wiring
- 100-amp fuse for 4-gauge wiring
- 250-amp fuse for 1/0-gauge wiring
Alternately, look for amplifier wiring kits that are tailor to your amp’s requirements. Amplifier wiring kits make it easier to avoid confusion and damage by combining fuses with the appropriate power, ground, and turn-on wires in a single convenient package.
RCA Cables and Speaker Wires
To receive input signals from the stereo receiver’s output, amps typically require RCA cables. Stereo pairs and a variety of lengths are available for RCA cables.
You can use any size of speaker wire, from 18 to 14 gauge, to connect your amp’s output to the speakers. Use wires with gauges between 16 and 12 for subwoofers.
Check Also- How to Change a Car Engine 2024
Step-By-Step Guide
Once you’ve got all your components and wiring ready to go, that time to get to work!
NOTE: Installation specifics depend on the amp equipment you purchased and the make of your vehicle and car. When in doubt, call the pros of Amp!
Step 1: Disconnect the Car Battery
The parking brake should be engage and your vehicle should be park on a level surface. Open the hood from here and start disconnecting the battery from the negative terminal. During the process of installing your amplifier, this will assist in reducing the risk of electrical shocks and shorts.
Step 2: Mount the Amp
Select a secure spot to mount your amplifier securely. In most cases, the instructions that come with the product will include a few suggestions.
Because amps generate a lot of heat, they require a few inches of air space on all sides to keep cool. Don’t put the amp on its side! Although you may be able to save space, the heat it produces will simply radiate back into the amplifier, posing a fire risk and leading to overheating.
Additionally, you must ensure that there is sufficient space to connect wiring and adjust the controls. But there’s more! In order to avoid interference and radiant noise, your amplifier should also be at least three feet away from your stereo. Noise issues can also arise if you bolt the amplifier directly to the metal chassis of your vehicle. Before attaching it to your car’s body, use rubber grommets around the mounting screws or mount it to a wooden board.
Possible locations to mount your amp includes:
- On the passenger-side firewall—use the short wires and patch cords
- In the trunk/hatch area
- Under a seat
Keep in mind that the wiring needs to be hidden for both safety and aesthetic reasons. You will need to run the wiring under the dash, kick panel, door scuff plate, or pillar trim panel, depending on the location you choose. Most of the time, you can remove these panels by unscrewing them or prying them up at the edges.
Secure the wiring with plastic wire ties, especially if it is hidden behind the dash, to keep it out of the way of the vehicle’s moving parts.
Check Here- How to Delete WazirX Account
Step 3: Install the Power Wire
The power wire from the car’s battery must be routed through the firewall and through the car’s body to the amp.
Find a unused firewall grommet to pass the wire through to accomplish this. Alternately, you can locate one with room for the power wire to pass through and wires to pass through.
Drill a hole through the firewall if there are no existing grommets, making sure not to drill into gas lines or electrical wires on either side. To protect the wire that is passing through the new hole, use a grommet.
Step 4: Install the Fuse Holder
You can skip this step if a fuse holder has already been install on your power wire.
It is acceptable if it does not. Install the fuse holder in a location that is less than six inches from the car battery, ideally. Using a cable tie or a screw, secure the holder.
Remove a short section of the power wire from its end. From the car battery, this piece ought to be able to reach the fuse holder. The newly cut wire piece’s insulation should be remove from both ends with a wire stripper.
Attach one end of this short piece of wire to a terminal ring from your wiring kit by crimping it in place. On the other end, attach the fuse holder.
Connect the power wire end to the other end of the fuse holder after removing the insulation.
Click Here- How to Sleep Comfortably in a Car 2024
Step 5: Connect the Power Wire
Connect the power wire to the positive terminal of the battery.
If a ring terminal is not already attached to the power cable end of a top-mounted battery post, crimp it on. Place the power cable’s ring over the bolt that holds the battery terminal to the battery post after removing the nut from the terminal. Then, substitute the nut.
Vehicles with side-mount battery posts can use terminal adapters.
Pass the power cable through a wire loom until it reaches the firewall, then cut it to fit. The short wire connected to the battery and fuse holder should then be covered with wire loom.
Step 6: Install the Ground Wire
Locate a bolt close to the amplifier on the metal frame of your vehicle. Drill a hole for one if you can’t find one, making sure not to drill into any lines, wires, or the gas tank.
Attach a ring terminal by crimping it to the short ground cable. Clean the bolt location of paint and dirt so that the ground wire connects to the bare metal. The terminal should then be securely bolted to the car’s metal chassis.
The most common reason for amp issues in car stereos is improper or loose grounding.
Step 7: Plug in RCA, Speaker, and Remote Turn-On Leads
Connect the amp to the back of your stereo head unit using these leads. You will need to connect the power wire fused-output terminal to the turn-on wire if your head unit does not have a remote turn-on output.
From the amplifier, connect the wires for the front, rear, and subwoofer speakers to the appropriate speakers.
Verify that each wire is secure and tight after it has been connected.
Click Here- How to Program a Car Key 2024
Step 8: Turn It On
Turn off all filters, bass boost, and EQ, reduce all amplifier gains to minimum. Check the safety of the main fuse. Also, reconnect the negative battery cable in your vehicle.
Turn on the radio and your vehicle. See if the amp’s power light is on. Turn up the music and make sure that each speaker is receiving sound.
The balance, fade, and subwoofer settings on the head unit can be used to test the stereo system. Verify that no distortion or static is present in any of the speakers.
Adjust the gain of the amplifier to match the level of the receiver’s output and the amp’s input.
Install the stereo and paneling again if everything sounds good.
Troubleshooting
Common problems that occur with DIY car amp installations includes:
- Needing to reset the factory radio’s anti-theft security code;
- A malfunctioning electrical system;
- No sound coming from the speakers; and
- Noise coming from the speakers.
To quickly fix these problems, or avoid them it altogether, get expert helps.
Visit the car amplifier installation specialists for professional and worry-free car stereo Amp upgrades and installations.
Check Here- How to Jack Up a Car 2024
Conclusion
Install a Car Amp Another thing to think about is that amps make heat, which is why cooling fans are need. They should always be placed in a way that lets in as much air as possible. Mounting the amplifier on the side of the box is a good option if you want to put subwoofer speakers in it. To minimize damage and maximize airflow, mount them high. The next thing to think about is how you’ll connect the power wire to the battery and the wiring from the amp to the stereo’s head unit.
When possible, it is best to follow preexisting wiring looms and run the wiring underneath the floor trimmings that run along the bottom of the door sills. To prevent interference, RCA cables should be route on the opposite side of the vehicle from the power wires. Always remember where your battery is in the engine bay, and use the main power wire to get as close to it as possible.
Related Post:-
How to Remove a Dent in Car With Hair Dryer